I figured I would through in a quick "How To" sort to speak of a mod that I recently did. My factory turbo on my truck just wasn't cutting it so I began to look for a replacement. I found a brand new 2003 factory turbo that was sitting in the plastic taking up shelf space inside a warehouse in Texas. Many do the swap because of the distinct "whistle" that it produces on trucks with a free flowing exhaust. When I did the swap I noticed I had gained 2-3lbs of boost and my throttle response actually increased slightly. So without further waiting, here is my promised quick write up.
The install is fairly simple. All in all it took me and two buddies 3 hours to do, but that was including taking time to talk on the phone and drink a few cold ones. There really are 7 basic steps that you need to complete to do this swap. I would venture to say that anyone with basic knowledge of how to use hand tools can do this in their garage or driveway.
1. Drain coolant from overflow bottle, disconnect the small coolant return hose on the left side and the large coolant supply hose from the bottom of the over flow bottle. Both these hoses are held in place by simple clamps. Then remove the entire over flow bootle. This will give you some more room to work; which on these motors is always a good thing.
2. Because I have an aftermarket intake on my truck it, it took me a little longer to remove it. Due to the sheer size of my intake (AFe Stage II:http://innovativediesel.com/i-961921-afe-pro-dry-s-stage-2-type-si-intake-system-51-80392.html ) it had to be removed to gain enough access to the turbo and pedestal.
3. Un-bolt the turbo from the pedestal. This is accomplished by simply using a wrench/socket and taking out three bolts. At this time, I also disconnected the oil drain tube/branch tube. Becareful not to damage the tube because it is fragile and if it's damaged, you must wait until you visit your local Ford Parts dealer and purchase another before driving. After this is done, you can wiggle the turbo out from the pedestal. This takes some patience because it can easily become frustrating. To help give alittle more space, you can un-clip the cowling that conceals the under hood wiring that runs along the fire wall. It is simply held in by plastic clips and can easily be re-secured.
4. Un-bolt the pedestal. Using the same method as with the turbo. The pedestal is held down by four bolts. After it's unbolted, you can then remove it.
5. Replace the old pedestal with a 2003 model pedestal by bolting it in place with the same four bolts removed from the previous pedestal.
6. Bolt the new turbo in place using the old bolts and re-attach the oil supply tube. Make sure to check the o-ring on the tube to make sure it's in good shape. I went ahead and replaced mine just to be safe, considering they are only a couple cents.
7. Re-install the air intake and over flow bottles and fill with fresh coolant.
Parts Needed:
1. 2003 Turbo and Pedestal
2. 2003 Turbo Parts kit (provides you with new 0-rings, washers, bolts, etc)
Photos:
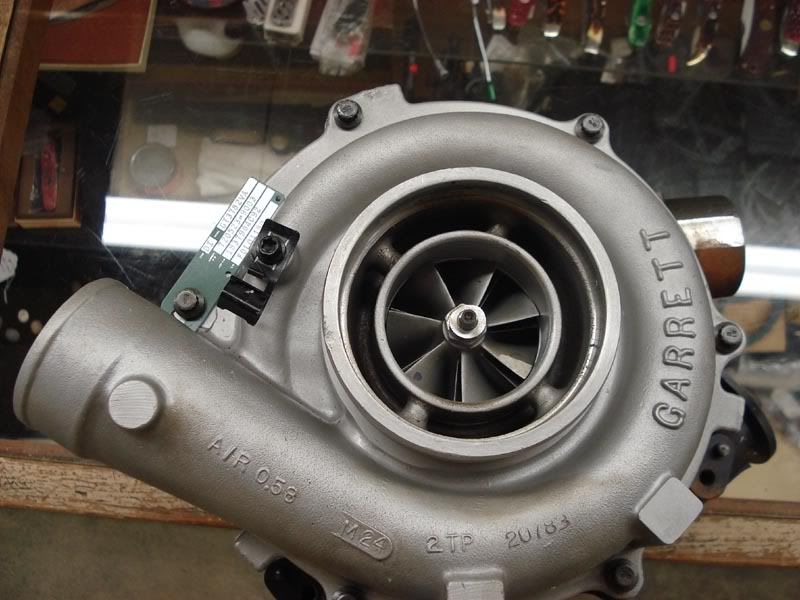
1. This photo shows the front of my new 2003 turbo:
http://i179.photobucket.com/albums/w289/fordzilla_photos/Truck/turbo004.jpg
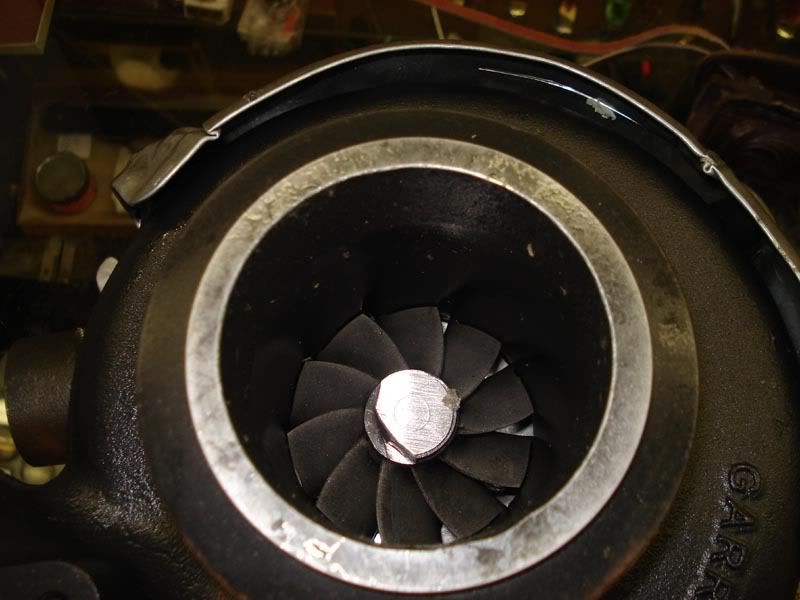
2. Exhaust side of the turbo. Note it only has 10 blades which gives it that unique sound:
http://i179.photobucket.com/albums/w289/fordzilla_photos/Truck/turbo001.jpg
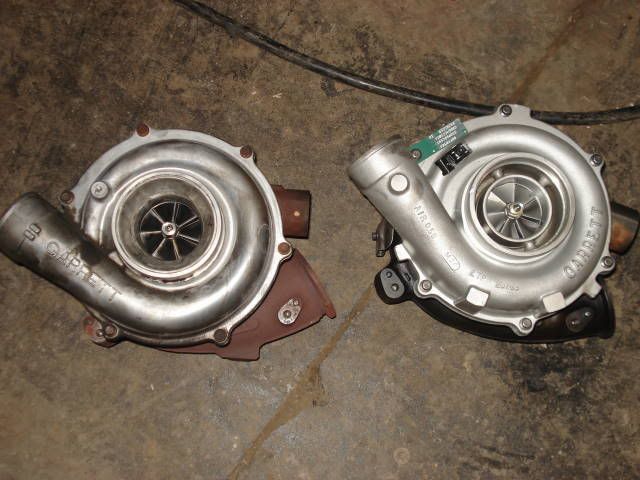
3. Comparison between 2005 (Left) & 2003 Turbo (Right):
http://i179.photobucket.com/albums/w289/fordzilla_photos/Truck/DSC02006.jpg
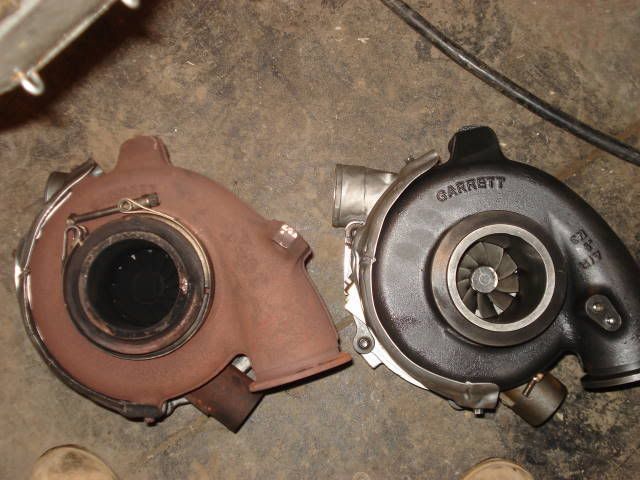
4. Comparison shot of the exhaust sides 05 (L) and 03 (R):
http://i179.photobucket.com/albums/w289/fordzilla_photos/Truck/DSC02007.jpg
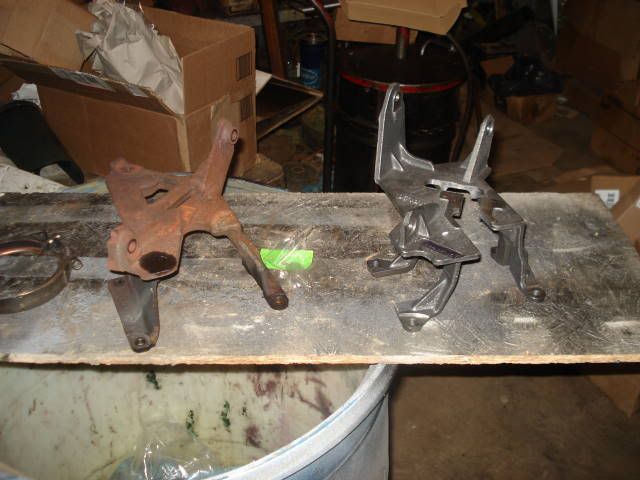
5. Comparison of pedestal differences 05 (L) and 03 (R):
http://i179.photobucket.com/albums/w289/fordzilla_photos/Truck/DSC02009.jpg
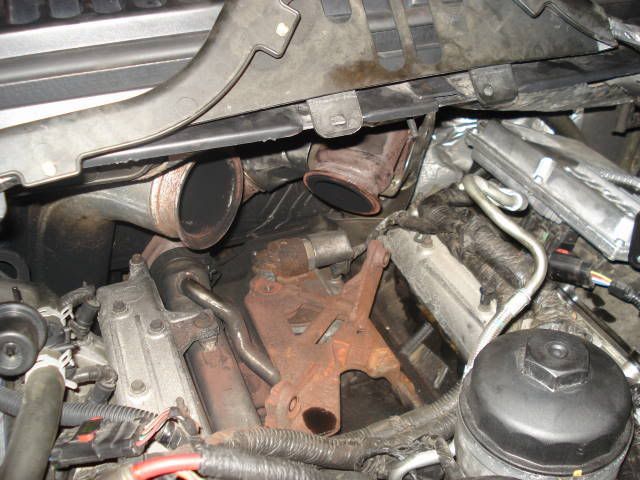
6. 2005 Turbo removed; close up of 2005 pedestal still on the truck:
http://i179.photobucket.com/albums/w289/fordzilla_photos/Truck/DSC02008.jpg
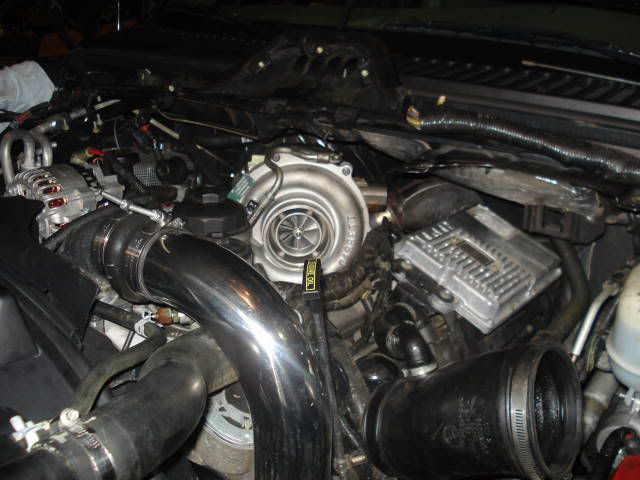
7. New Turbo and pedestal in place:
http://i179.photobucket.com/albums/w289/fordzilla_photos/Truck/DSC02010.jpg
I hope this very brief and non-formal "How To" can help you guys out who are planning to do this mod.
Overall Assessment: 1-10 Rankings
Difficulty: 4
Time: 5
Satisfaction: 9
Wednesday, May 12, 2010
A Real Head Case
The number one issue that potential buyers and 6.0L owners worry about is failing head gaskets. Gaskets fail for a couple different reasons. First, they can fail because the motor is being subjected to extreme cylinder pressures. This is common among many trucks running chips or programmers to boost performance. Many of these electronic performance inhancers do nothing more than fool the computer into dumping more fuel into the cylinder. When this happens the cylinder pressures spike and can get high enough to blow through the MLS (Multi-Layer Steel) gaskets that seal the heads. Another reason for high cylinder pressures occures during heavy towing with the truck. The added strain of hauling heavy loads can be enough to blow head gaskets. Another reason head gaskets blow is because over time the TTY (Torque To-Yield) bolts that clamp the cylinder heads down to the block can weaken over time. The repeated heating and cooling of the bolts can be enough to cause fatiuge and casue the bolts to stretch, thus preventing enough clamping force to be applied to the MLS gaskets to seal the heads. Another common issue among 6.0L motors are damaged heads or blocks. Many motors came direct from the factory with heads and blocks that were either not completely flat or had minor hair line cracks.
To correct these problems, many 6.0L owners prefer to use a different type of clamping method for the heads. Many opt to use a Head Stud, which have higher strength ratings and clamping force than the factory TTY bolts. The most common Stud used is manufactured by the ARP Company. These upgraded Studs supply an upgrade in construction, durability, and clamping power with ratings of over 220,000 psi tensile strength. Another option to consider are H-11 Studs. These studs are made of high strength H-11 Tool Steel and offer a tensile strength rating of over 240,000 psi.
These are great options to consider but, they will do nothing if the surface of the heads and block are not flat. Many people have installed aftermarket studs only to have problems blowing head gaskets again. The first thing to do when your head gaskets fail is to inspect the head itself. The heads need to be sent to a machine shop where they can be decked and if needed magnifluxed to remove any cracks. Once this is done, a close inspection of the block should be done. Many 6.0L that are exposed to high temps and blown head gaskets for a long enough time develop hair line fractures and cracks in between the cylinder walls. If this happens, there is a high probability that the entire block needs to be replaced.
Tuesday, May 4, 2010
Clean Oil Leads To A Happy Truck
Another problem that seems to spring up on the 6.0L PSD are problems related to injector failures; either an injector is stuck open, closed, or completely dead. The 6.0L uses a complicated system in order to fire the injectors known as the HEUI (Hydraulically-actuated, Electronically-controlled, Unit Injectors). Great, so what does this mean?
The HEUI system depends on a second high pressure oil pump to deliver high pressure oil to each injector; pressures range from 500-3000psi. A solenoid on top of the injector is then actuated, this forces the high pressure oil down inside a chamber within the injector itself. This oil pressure then provides enough force to physically push down an intensifier piston within the injector; thus pushing the fuel into the cylinder at pressures as high as 21,000psi.
It is amazing to think about this complicated process; but now remember that it happens thousands of times a second! Because this process relies so heavily on a supply of fresh clean oil, it is imperative that the injectors receive the cleanest oil possible.
To as the oil is pressurized and forced through gallery passages in each cylinder head and the injector itself; it really takes a beating. Eventually the oil breaks down and severe shearing occurs (a reduction of viscosity) thus degrading the effectiveness of the oil to lubricate parts. This in turn leads to damaged injectors and other parts.
How to prevent this from happening:
1. Make sure to change your oil! The recommended service interval for the 6.0L is 5,000 miles. It is important to stick to this schedule so your oil does not break down to the point to cause damage.
2. Use the right oil. Regular oil breaks down faster than synthetic oil under normal use. Now imagine how fast it breaks down when under the constant assualt that a diesel engine throws out it on a daily basis. I personally have gone through 12 injectors with my truck will running non-synthetic oil. I made the switch to Valvoline Premium Blue Synthetic oil 5w-40 and have yet to have another injector failure.
3. Use the correct filters. Many people make the mistake of finding the cheapest filters to use in their trucks. DO NOT do this! Use the OEM filters. Think about this; is the extra 5 dollars you save on that filter really worth the risk of damaging a $300 injector?
Remember, you already made the heavy investment of purchasing a diesel truck. You want to make sure it can run reliably for a long time to come, so don't skimp on the routine maintenance.
Tuesday, April 27, 2010
A Few Tips For Maintenance...
The 6.0L can either be a very reliable motor or one that seems to be plauged by problems. The most common problems that people experience during their ownership of these platforms are EGR Valve failure, Injector failure, Head Gasket failure, and Turbo failure. Although some trucks experienec legitimate engine failures and broken parts, many of the commone problems can be associated to either lack of proper maintenance and/or owner abuse. This next series of posts are designed to take each one of these problem areas and explain alittle bit more about them: why they happen and how to prevent them.
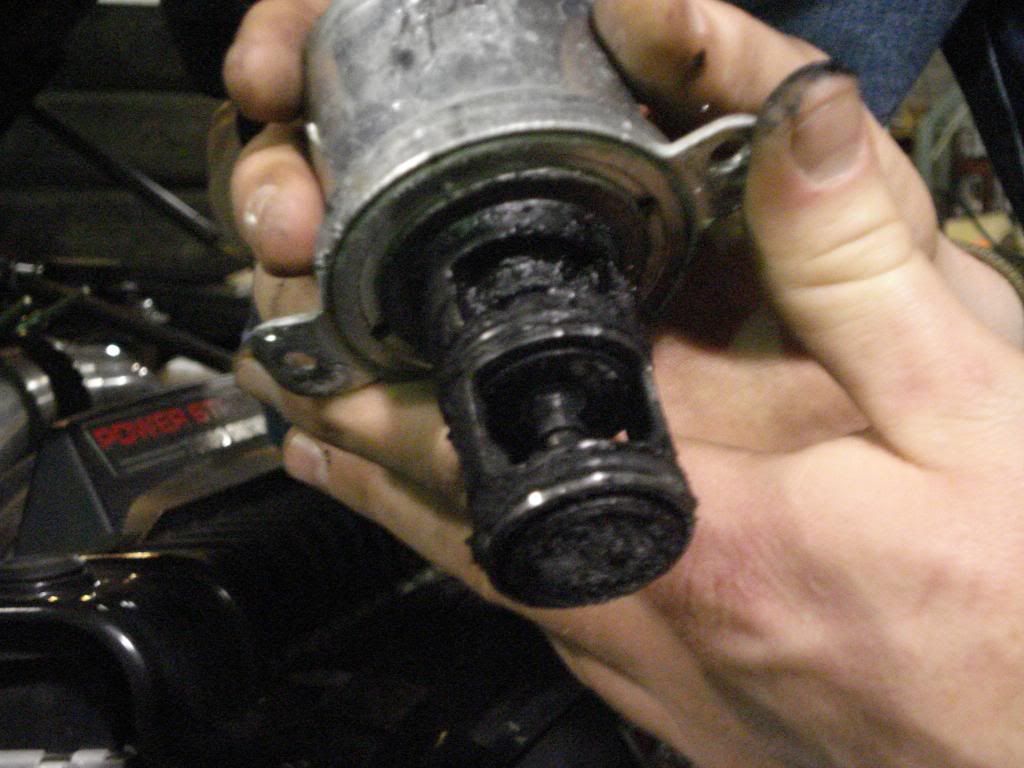
1. EGR Valve failure: The EGR Valve is a sensor that actuates the internal valve of the EGR Cooler. Thus determining how long the valve should stay open and therefore how much exhaust gas to recirculate to reduce emissions output. Because spent exhaust gases travel through this valve constantly while the truck is running it can easily become clogged or sticky. This happens when soot (also known as the partially burnt fuel in the exhaust gas) travles through the EGR Valve and becomes stuck to the sensor/valve assembly. This can lead to the valve not working properly and thus causing EGR Cooler failures and even blown head gaskets from the super heated exhaust flash boiling the coolant.
The Fix/Prevention: The easiest way to fix/prevent this is to make sure to check your EGR Valve for build up each time you change the oil. The proper way to do this can be found here http://competitiondiesel.com/forums/showthread.php?t=392. Basically park your truck with the front end slightly down hill. Next remove the two 8mm bolts that hold the valve in place and remove the valve. The removal can be a little tricky because it is vacum sealed into the port, but once it moves the first 1/8th of an inch it will just pop right on out. Check the valve for soot build up and clean if needed with a soluable cleaners such as Parts Washer. Next check the floor of the intake manifold for wetness. If the intake manifold is in fact wet, then you have a problem brewing with the EGR Cooler, meaning it is leaking coolant into your intake manifold. The advisable action to fix this would be to either take it to a dealership for EGR Cooler replacement or you cand do it yourself!
Here is what a clogged/sooted up EGR Valve looks like: http://i179.photobucket.com/albums/w289/fordzilla_photos/Truck/DSC00827.jpg
Here is an example of an intake manifold with a leaking EGR Cooler: http://i179.photobucket.com/albums/w289/fordzilla_photos/Truck/DSC00832.jpg
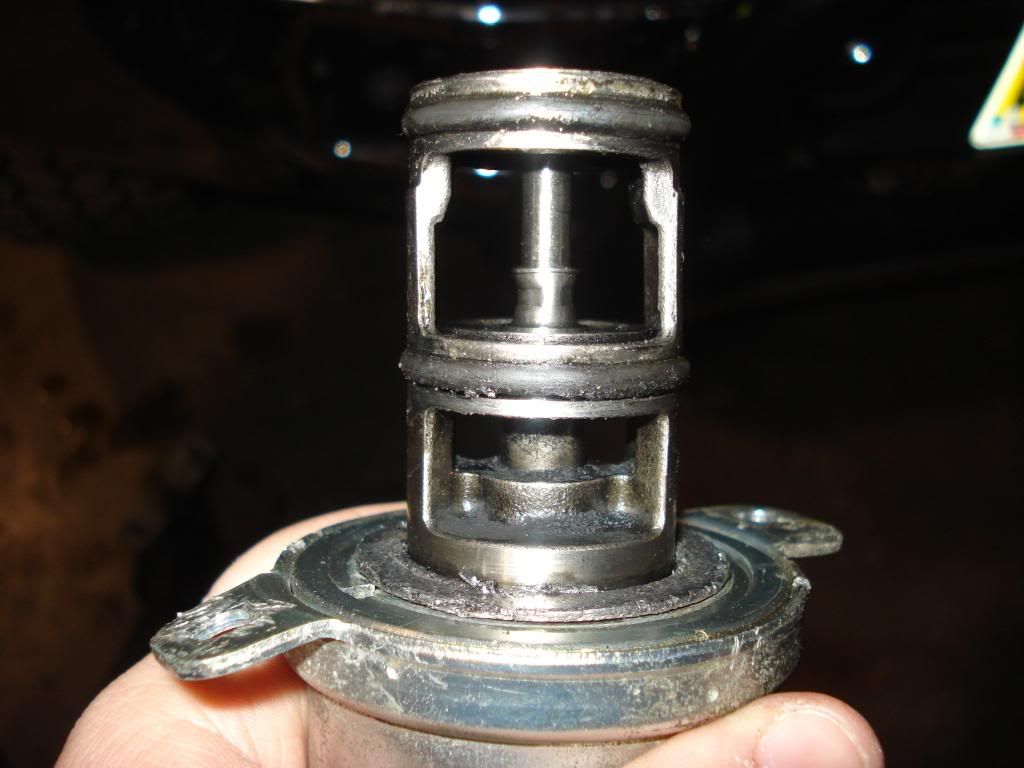
Here is the Valve from the first picture cleaned and ready to be re-installed:
The Next post will address the problems related to Injector Failures!
Tuesday, April 13, 2010
The More You Know...
Before you can start to modify your Powerstroke; it is very important to understand as much as you possibly can about how it works. This may seem alittle silly but understanding each component of the motor and how they all work together is a very important piece of knowledge to have not only for modifying your rig but for keeping it in tip top shape! So for today's post, I will be discussing the characteristics and specifications of the 6.0L Powerstroke.
The 6.0L Powerstroke is in all statistical purposes a rebadged and recalibrated International VT365 powerplant. The only differences are slight higher horsepower and torque ratings boasted by a more aggresive factory engine calibration. It first entered Ford's Super Duty line up in 2003. It was adopted because of the strict and ever changing emissions standards the automotive industry faced. It begain phasing out the 7.3L Powerstroke in mid model year 2003 trucks. When it was first developed the 6.0L was accepted as a revolution in the diesel community. It incorporated one of the first factory emissions control systems; known as the EGR (Exhaust Gas Recirrculation) System which drastically cut the emissions output of the motor. Another first was the adoptation of newer technological advances in Turbo design. The 6.0L was the first mass production medium duty diesel to introduce the Variable Geometry Turbo. The VGT helped to reduce turbo lag leading to increased low end throttle response and acceleration. Despite having 1.3L less displacement than its predecessor, the 7.3L, the 6.0L was able to deliever a vast improvement in both performance and fuel economy. This use of innovative technology landed the 6.0L a spot on the Ward's 10 Best Engines of 2003 list.
6.0L Specs:
Displacement: 365 cu. in.; 6.0 Liters
Configuration: V-8
Compression Ratio: 18.0:1
Bore: 3.74 inches
Stroke: 4.13 inches
Injection: Direct Injection, Electro Hydraulic Generation Two (G2) Injection Technology
Aspiration: Single Variable Geometry Turbo (VGT)
Valvetrain: Single Gear Driven Camshaft; 4 Valves per Cylinder (32 Valve)
Oil Capacity: 15 Quarts
Weight: Approx. 966 lbs
Horsepower(peak): 325 hp @ 3,300 rpm
Torque(peak): 570 lb-ft @ 2,000 rpm
Thursday, April 8, 2010
A Little About This Blog
In April of 2005 I became the proud owner of a 2005 Ford F-250 Super Duty equipped with the 6.0 Powerstroke Turbo Diesel. I have spent the past five years modifying this truck to my own personal liking and needs. This was the first diesel truck that I have ever owned, so I was alittle behind the curve when it came to knowing the ins and outs of not only maintenance but also modifications. So I began to search anywhere I could to find information and answers to my questions.
During my searching I discovered one thing rather quickly; there is alot of information floating out there in cyber space reguarding these trucks. I developed this blog because I believe it is important to assimilate this very important information into one centralized location. I will be updating this blog with posts designed to give insight into the proper maintenance techniques and tips to make your 6.0 Powerstroke run for a long time. I will also be doing comparisions and write ups of how to install some of the more popular modifications that will lead to not only increased performance but also fuel economy.
If you have a specific question or something to contribute, please feel free to leave a comment and let me know what is on your mind! Thanks for checking out this blog!
Subscribe to:
Comments (Atom)